Payment Form (Low-Code)

Our Payment Form solution provides a secure and PCI-compliant way for merchants to accept payments on their website. Customers enter their payment information directly into our payment form, and we handle the payment processing.
Payment Form Integration is the best for merchants who:
- Want to be PCI-compliant.
- Want a fully secured and developed payment form.
- Want to provide an additional payment option alongside their existing integration.
Step 1: Create an order
This step describes how to create an order once your shopper is ready to pay.
The available endpoint destination URL:
Environment
URL
Operation Method & Endpoint
Operation Description
PROD
api.sibsgateway.com
POST api/version-id/payments
Performs a request to prepare the checkout required data and returns with the Payment Form.
CER
stargate-cer.qly.site[1|2].sibs.pt
POST api/version-id/payments
Performs a request to prepare the checkout required data and returns with the Payment Form.
Action 1: Define the header and add merchant and customer information
Check below the full description of the required data to start creating your order.
For logged users the CustomerName and CustomerEmail elements are mandatory.
This will prevent the user from having to fill them in again in the Payment Form.
Action 2: Add transaction information to your order
Now, it is time to include your transaction information based on the payment methods you want to render in your paywall.
Check here the instructions to:
- Perform an instant capture
- Perform a pre-authorized capture
Action 3: Complete your order including additional and optional information
In this step, we show you that there is plenty of optional information that you add to complete your order creation. Please check below the additional information based on some use cases:
Set up 3D Secure
Payment authorisation with 3D Secure authentication (frictionless or challenged).
Store cards
Save a shopper’s details and make recurring and subscription payments.
Use OneClick card
Activate the most seamless and quick way to accept payments.
Set up Webhooks
Keep your system up-to date on payment events and status changes.
Here is an example of how to create an order.
	Request Body:

{
    "merchant": {
        "terminalId": 24,
        "channel": "web",
        "merchantTransactionId": "Order Id: 5hraff455o",
        "transactionDescription": "transaction short description",
        "shopURL": "https://mytest.e-shop.pl/"
    },
    "transaction": {
        "transactionTimestamp": "2023-05-16T10:33:43.587Z",
        "description": "transaction statement description",
        "moto": false,
        "paymentType": "PURS",
        "amount": {
            "value": 50.5,
            "currency": "PLN"
        },
        "paymentMethod": [
            "CARD",
            "BLIK",
            "PAY_BY_LINK"
        ]
    }
}
Step 2: Create the payment form
To create the payment form you just need to add the following lines of HTML/Javascript to your page and populate the following variables that you got in response from the first step:
- The checkout’s transactionID that you got in the response from the first step:
<script src="https://stargate-cer.qly.site1.sibs.pt/assets/js/widget.js?id={transactionID}"></script>
- The formContext that you get in response from the first step and a formConfig:
<form class="paymentSPG" spg-context="{formContext}" spg-config="{formConfig}"><form>
-
The formConfig is necessary for you to be able to create the form correctly.
	formConfig -> spg-config="{formConfig}"

		{ "paymentMethodList": [],
		"amount": { "value": 50.50, "currency": "PLN" },
		"language": "en",
		"redirectUrl": ""}
The attribute attr.spg-config is a JSON in a string format with the follow parameters:
Parameter
Type
Available values
Description
paymentMethodList
String
‘CARD’
‘TOKEN’
‘BLIK’
‘PBLKV’
Payment methods to show on the form.
Only Payment Methods enabled on your account can be used.
amount
{ value: number, currency: string }
–
Transaction amount value
language
String
‘pt’
‘en’
‘pl’
Form language (ISO 639-1 Format)
redirectUrl
String
–
URL where the user should be redirected at the end of the checkout
After the payment has been processed, a page displaying the transaction status is presented, and the customer is then redirected to the redirectUrl defined.
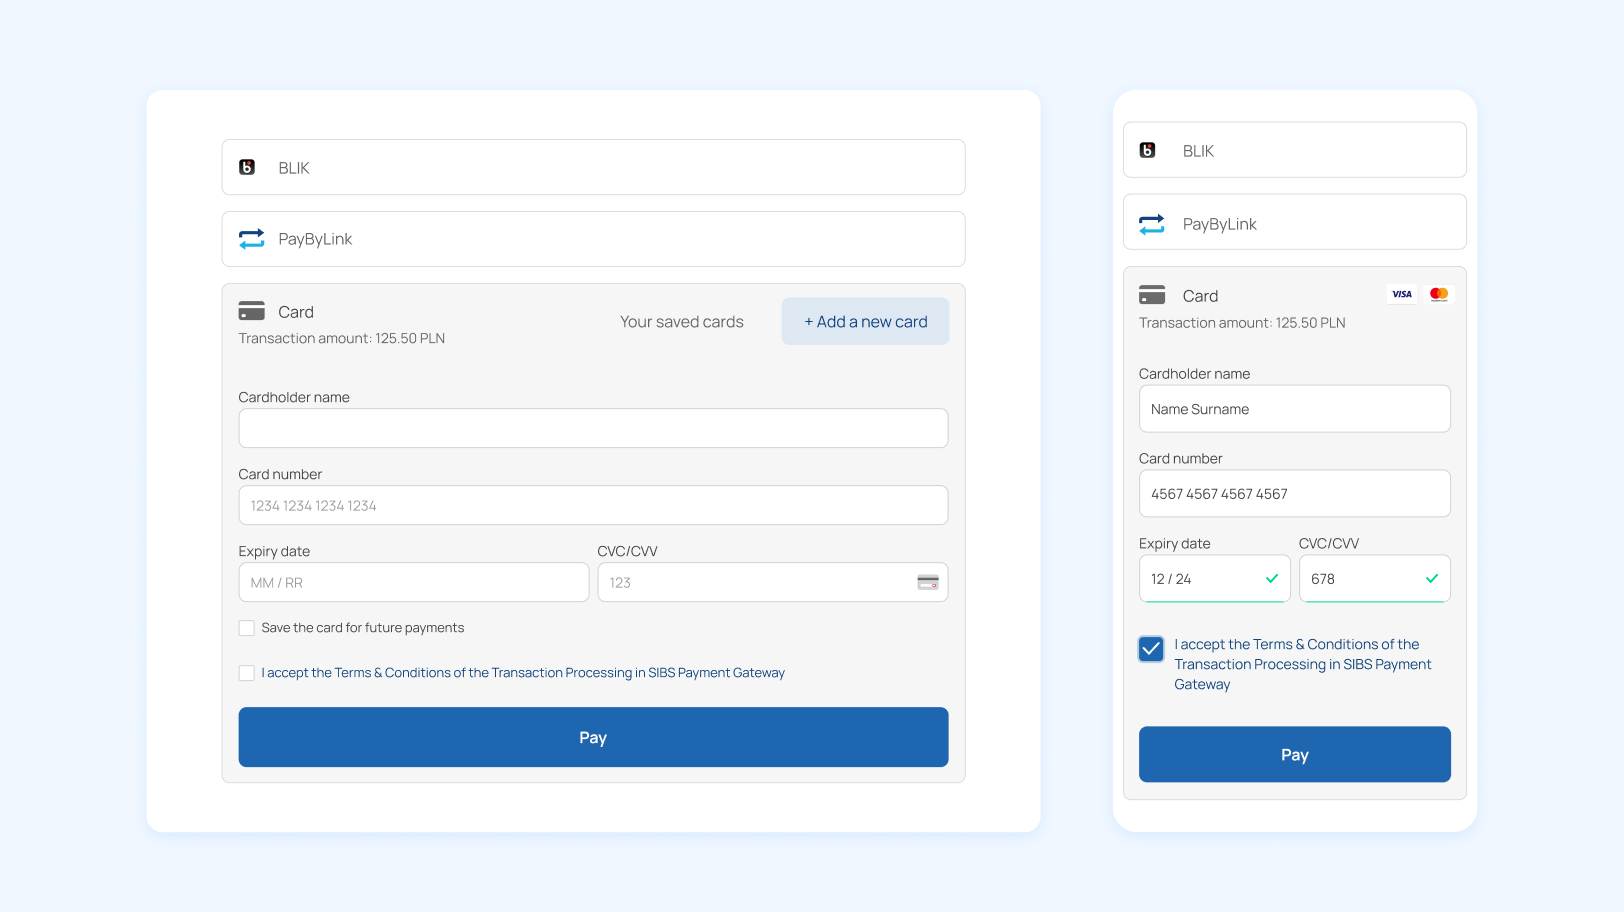
You can find the default look and feel of the Payment Form below, where the customers can seamlessly enter their payment details and complete the transaction:
Step 3: Get the payment status
You can check the status of your transaction making a GET request.
	GET {transactionID}/status

Request URL:
https://stargate-cer.qly.site1.sibs.pt/api/v1/payments/{transactionID}/status
Request Headers:
Authorization: ‘Bearer <AuthToken>’
X-IBM-Client-Id: ‘<ClientId>’
Content-Type: application/json

